Introduction to Thumbnail Maker
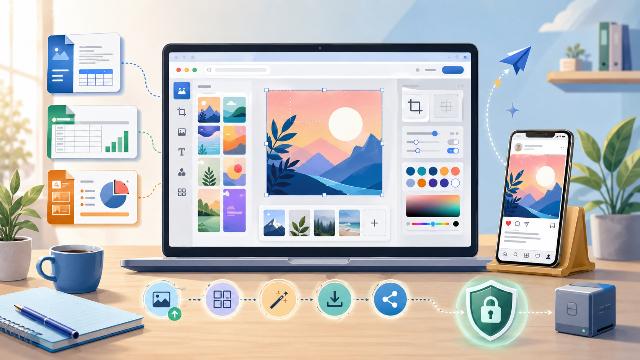
LibreOffice allows you to write documents, create presentations, prepare spreadsheets, and design graphic materials. However, publishing content often requires a final step: creating an image suitable for the web and social media.
Introducing Thumbnail Maker
Thumbnail Maker now fulfills this purpose. This companion tool for LibreOffice enables you to create thumbnails, covers, banners, or social media posts directly in your browser.
Streamlined Workflow
For example, you can write an article with LibreOffice Writer, prepare a presentation with Impress, and then create its cover image using Thumbnail Maker. This way, you get a properly formatted visual without opening complex graphic software.
User-Friendly Features
The tool is free to use, requires no registration, and does not need any installation. Moreover, it processes the selected images directly in the browser, so your files remain on your device.
Complementary Tool for LibreOffice
Thumbnail Maker is not a new application within the LibreOffice suite. It is also not an integrated extension of Writer, Impress, or Draw. It simply complements these software programs by providing a quick solution for creating visuals intended for publication.
A Companion Tool to Extend Your Work in LibreOffice
LibreOffice meets various office needs. Writer facilitates text writing, while Impress helps in creating presentations. Calc manages data, and Draw assists in creating diagrams or graphic compositions.
However, these contents often end up on a website, a video channel, or a social network. You then need to create a suitable presentation image for each platform.
This step may involve:
- the thumbnail of a tutorial dedicated to LibreOffice;
- the featured image of a blog post;
- the cover of a LinkedIn publication;
- the announcement of a new training session;
- a banner for a video channel;
- the visual of a guide created with Writer;
- the promotion of a presentation designed with Impress.
Thumbnail Maker comes into play precisely at this moment. You finish your content in LibreOffice, then open the tool in your browser. You select the desired format and prepare the image that will accompany your publication.
This organization avoids burdening your working method. Indeed, you use LibreOffice to produce the main content and Thumbnail Maker to quickly create its visual presentation.
Thumbnail Maker Complements Writer, Impress, and Draw
The various modules of LibreOffice can feed many projects. However, each project does not require the same graphic tools.
Writer is particularly suitable for writing articles, guides, e-books, or professional documents. Once the text is finished, you can use Thumbnail Maker to create a cover image or a thumbnail.
Impress allows you to produce slideshows, course materials, and business presentations. You can then design a visual to announce their publication, download, or video broadcast.
Draw offers more freedom for diagrams, posters, and compositions. It is suitable for creations that require precise graphic work. Thumbnail Maker meets a different need, as it prioritizes speed and web-ready formats.
The two solutions do not oppose each other. On the contrary, they can complement each other.
| Tool | Main Use |
|---|---|
| LibreOffice Writer | Write an article, guide, or document |
| LibreOffice Impress | Create a presentation or training material |
| LibreOffice Draw | Create a more advanced graphic composition |
| Thumbnail Maker | Quickly prepare a thumbnail or web banner |
You can thus choose the tool based on the task. LibreOffice manages the source document, while Thumbnail Maker prepares the publication visual.
Create Thumbnails Without Installing Additional Software
Thumbnail Maker works directly from the web page >> https://tools.libre-office.fr/thumbnail-maker/. Therefore, you don’t need to download any additional programs.
This approach provides an immediate advantage. You can open the tool after finishing your work in LibreOffice without interrupting your activity for long.
The interface groups essential settings on a single page. You first choose the visual dimensions. Then, you select a template, a background, and your various text areas.
You can carry out all the work from a computer. The interface is also adaptable to mobile devices. Therefore, you can edit or create an image from a phone when the situation requires.
The tool does not require account creation. As a result, you avoid additional registration and immediately access the editor.
This simplicity aligns with the philosophy of the tools provided on tools.libre-office.fr. The site offers services accessible from a browser to complement common office use.
Formats Ready for YouTube and Social Media
Each platform imposes its own proportions. A YouTube thumbnail uses a horizontal format, while an Instagram post can adopt a square or vertical shape.
A LinkedIn banner demands different dimensions. Similarly, a TikTok cover does not meet the same constraints as an image intended for Facebook.
Thumbnail Maker thus integrates several predefined formats. The editor offers dimensions suited for:
- YouTube;
- Instagram;
- Facebook;
- X;
- Twitch;
- TikTok;
- LinkedIn;
- Discord.
You simply select the platform and content type. The tool then automatically configures the width and height of the creation area.
This function reduces errors. It notably prevents producing an image that is too small, distorted, or poorly cropped during publication.
You can also set custom dimensions. The tool accepts a width and height between 320 and 4,096 pixels.
This option becomes useful when preparing the featured image of an article on your own site. It is also suitable for newsletters, training sessions, and platforms that use specific formats.
How to Use Thumbnail Maker After LibreOffice
The operation of Thumbnail Maker remains accessible for beginners. You can create your first visual in a few steps.
Start by finishing your content in LibreOffice. This can be a Writer document, an Impress presentation, or material created with Draw.
Then, open Thumbnail Maker from your browser. Choose the platform on which you wish to publish your content.
Then select a predefined format or specify your own dimensions. The tool immediately adapts the workspace.
You can then follow this method:
- Choose a starting template.
- Select a background.
- Optionally import an image from your device.
- Add a short title.
- Customize the colors and text size.
- Check the safety areas.
- Download the result in PNG or WebP.
You can reuse an element created with LibreOffice. For example, export a slide from Impress as an image, then use it as a background.
You can also import a photograph that illustrates your Writer article. Thumbnail Maker will then help you crop it and add a title.
Use a Color, a Gradient, or Your Own Image
The background plays a crucial role in a thumbnail. It attracts attention and highlights the subject.
Thumbnail Maker offers three types of backgrounds. You can choose a solid color, a gradient, or an image saved on your device.
The solid color suits sober visuals. It can notably match the colors of a presentation or document.
The gradient creates a more dynamic composition. You choose a starting color, an ending color, and the orientation of the gradient.
Finally, the local image allows you to use a photograph, illustration, or screenshot. The tool accepts JPG, PNG, WebP, and GIF formats.
Several settings then facilitate image positioning. You can:
- fill the entire area;
- display the entire image;
- stretch the visual;
- modify its zoom level;
- move the image horizontally;
- move the image vertically.
You can also apply a dark overlay. This setting improves readability when the text appears on a detailed image.
However, the overlay must remain balanced. A value that is too high would obscure the background, while a value that is too low would reduce contrast.
Add Three Independent Text Areas
A thumbnail must convey clear information in a few seconds. Therefore, the text should remain short, visible, and well-placed.
Thumbnail Maker offers three independent text areas. You can use the first for the title, the second for a complement, and the third for a secondary indication.
Each area has its own settings. You can modify:
- the text;
- the character color;
- the background color;
- the size;
- the position;
- the rotation.
This organization allows you to prioritize information. For example, you can display the name of a tool prominently, then add the type of tutorial in a second area.
However, avoid copying the complete title of your Writer document. A thumbnail should remain understandable when displayed in a small size.
Therefore, favor a formula of four to eight words. You can then complete the information in the title of your article or the description of your video.
Respect the Safety Zones of the Platforms
Some platforms add elements over images. A profile photo, a button, or an information can obscure part of the creation.
Thumbnail Maker offers safety guides to avoid this issue. These markers indicate the areas where you should place important information.
You can activate the guides during creation. They do not appear in the downloaded image.
This function becomes particularly useful for banners. Indeed, their display often varies between a computer and a phone.
So, place the title, logo, or main subject in the center of the recommended area. You can reserve the edges for decorative elements.
Thanks to these markers, your visual retains more readability after publication.
Your Images Are Processed in Your Browser
Thumbnail Maker places significant importance on privacy. When you choose an image, the tool processes it locally in your browser.
The file is not sent to the site's server. It remains on your computer, tablet, or phone during creation.
This method is particularly beneficial for LibreOffice users. You can work with an illustration from an internal document without transferring it to a remote service.
This protection is also useful for:
- professional documents;
- contents that are not yet published;
- personal photographs;
- training materials;
- visuals reserved for a company or organization.
Of course, you must always verify that you have the necessary rights to the images used. Local processing does not change copyright rules.
Export the Result in PNG or WebP Format
Once the creation is complete, Thumbnail Maker allows you to download the visual in PNG or WebP.
The PNG offers very broad compatibility. You can use it on most sites, social networks, and office software.
You can also reinsert the PNG file into Writer, Impress, or Draw. For example, add your new thumbnail into a presentation document or guide.
The WebP often produces lighter files. Therefore, it is an interesting choice for web pages, as it reduces the weight of images.
Choose PNG when you seek maximum compatibility. Prefer WebP when you want to optimize the loading of a web page.
In both cases, the tool downloads only the final result. The guides and commands of the editor do not appear in the exported image.
Some Tips for Successful LibreOffice Visuals
The simplicity of the tool facilitates creation. However, some rules can greatly improve the result.
Start by defining a unique message. A thumbnail that is too cluttered may distract attention.
Then, use the colors from your document or presentation. This consistency will allow the audience to better recognize your content.
Use sufficient contrast between the text and the background. Clear text generally works on a dark image. Conversely, choose dark text on a light background.
Also, limit the number of colors. Two or three main shades are enough in most cases.
Finally, check the thumbnail in a small size. A creation that is readable on a large screen may become confusing on a phone.
You can also maintain a common structure for several publications. For example, use the same location for the title and the same color scheme for each LibreOffice tutorial.
This regularity reinforces the visual identity of your site, channel, or training.
A New Online Tool in the libre-office.fr Ecosystem
Thumbnail Maker joins the free tools offered on tools.libre-office.fr. These online services aim to facilitate certain tasks complementary to office work.
The tool does not replace Writer, Impress, or Draw. It addresses a more targeted need: to quickly transform an image into a thumbnail, banner, or social publication.
Its use requires no installation. You can therefore continue to use your usual version of LibreOffice on Windows, macOS, or Linux.
The process remains simple. You create your content in LibreOffice, prepare its visual with Thumbnail Maker, and then publish the result on the media of your choice.
This companion tool for LibreOffice thus becomes particularly interesting for bloggers, trainers, associations, businesses, and video creators.
It allows extending the work done in the office suite without imposing the learning of an additional graphic software.
Ultimately, Thumbnail Maker offers a practical bridge between office creation and online publication. It complements LibreOffice with a quick, free solution accessible from a browser.

